


About The App
TraxPath Fleet is a smartphone app for managers and owners who need a fleet overview while on the go. Push notifications, streamlined map, vehicle search, and event views let you access the information you need fast.
Features
- Download the app
- Finding your devices
- See vehicle’s info
- Share location and Navigation
- Events
- Trips
- Commands
- Geofences
Minimum requirements
Android 8 or iOS 12
Download the app
- iOS – Apple
Scan the QR code using the camera app on your mobile phone to get direct access to the app. If you’re already on your phone, tap the QR code to see the app in the app store.

- Android
It works inside the camera app when Google Lens Suggestions are activated. If you’re already on your phone, tap the QR code to see the app in the google play.

Using the app:
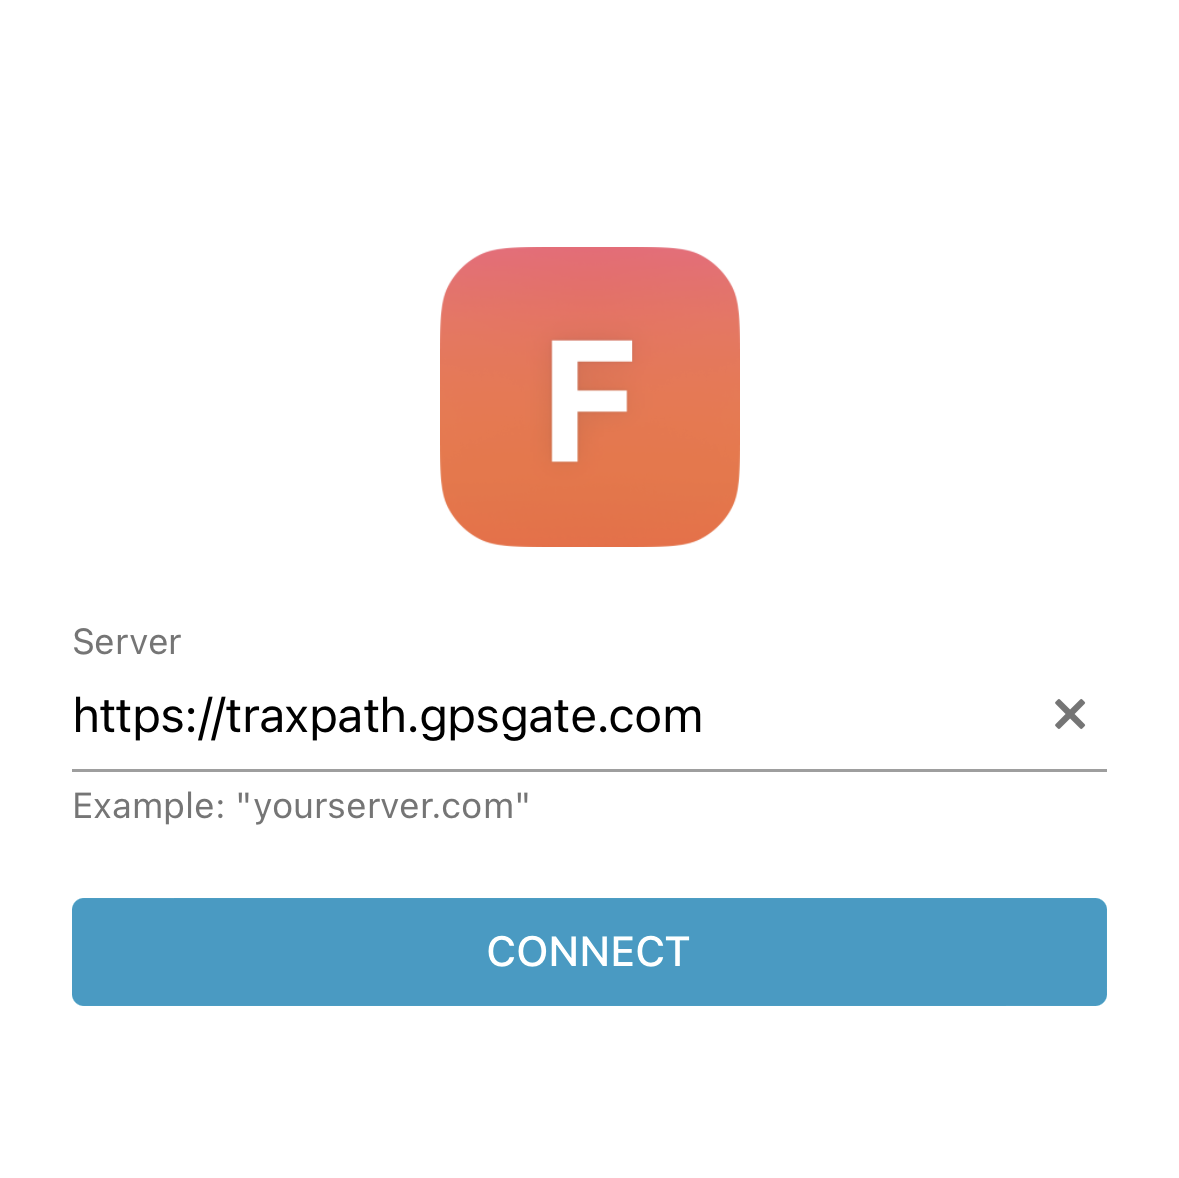
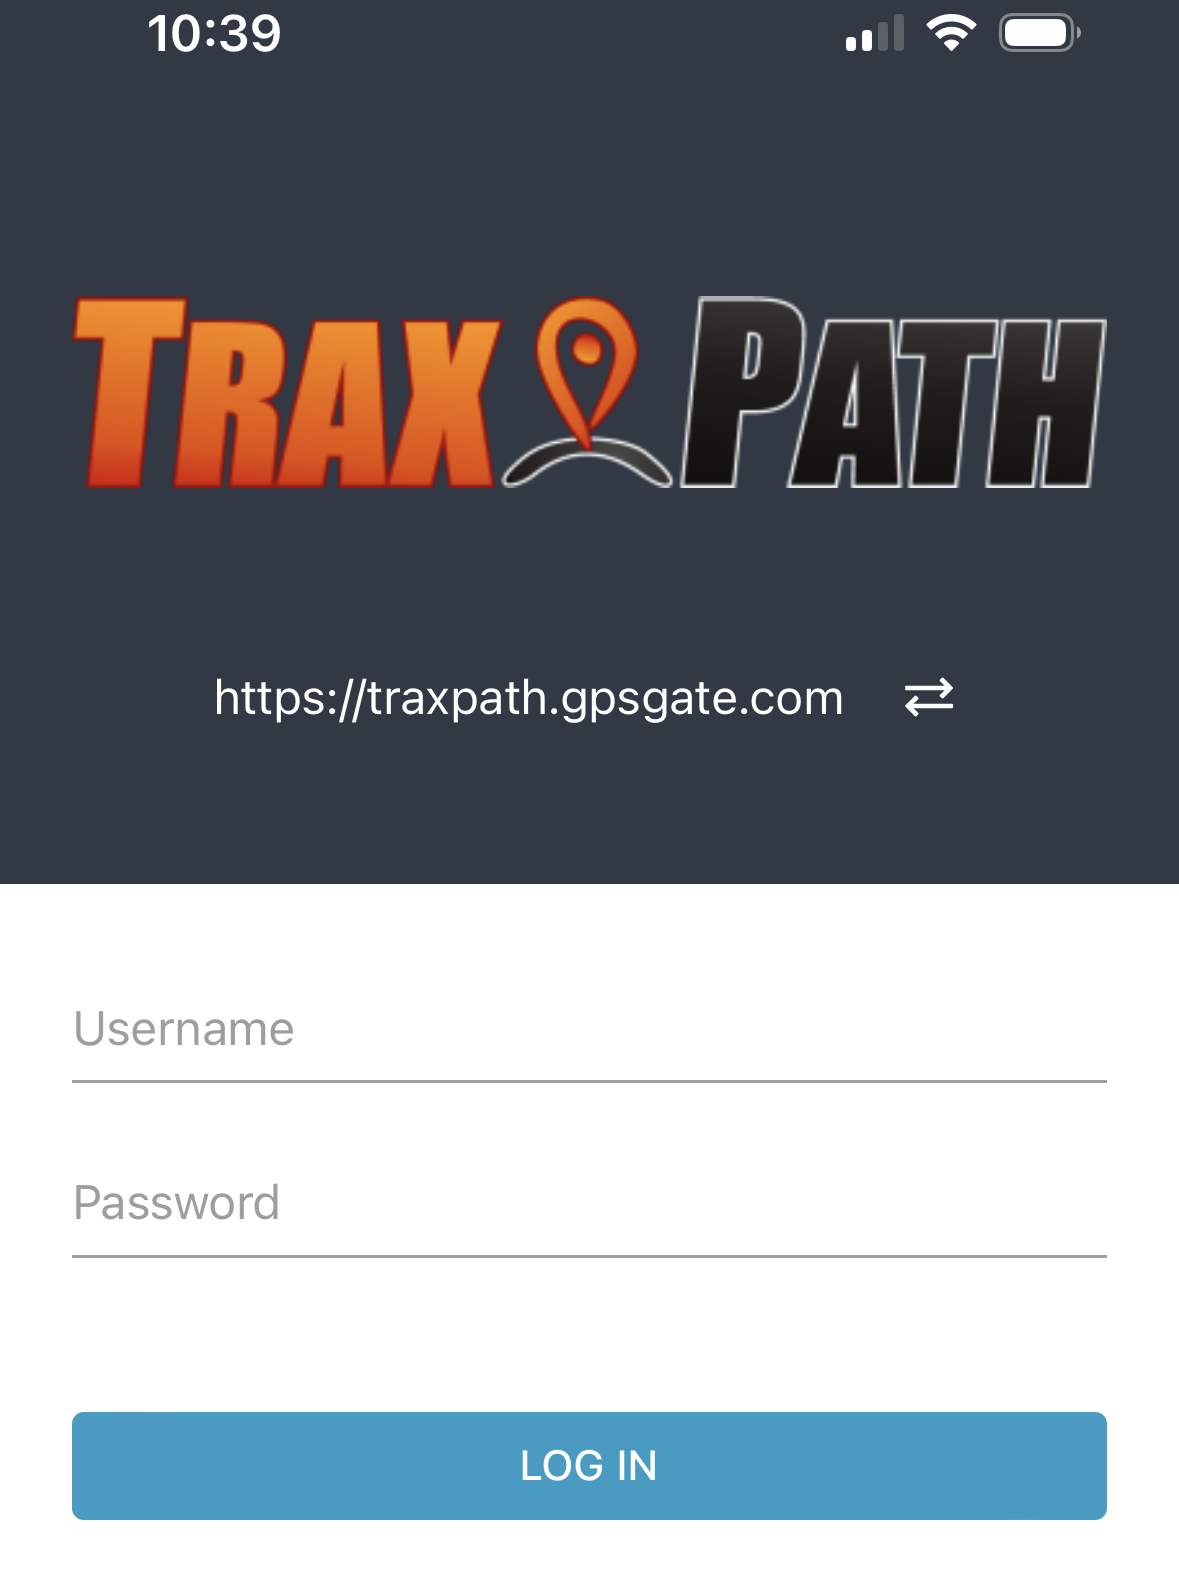
Log in to the application
- Log in to your server using your user credentials.
Using The App
Finding your unit
- If you only have one device, it will automatically zoom to your device. If you have multiple devices, they will be grouped. Tap on the group of vehicles to zoom in to that specific area for a close-up.
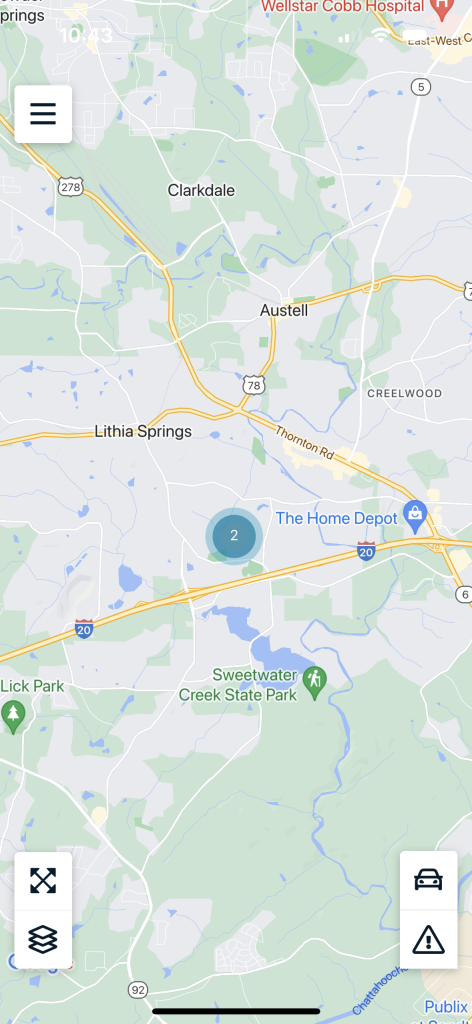
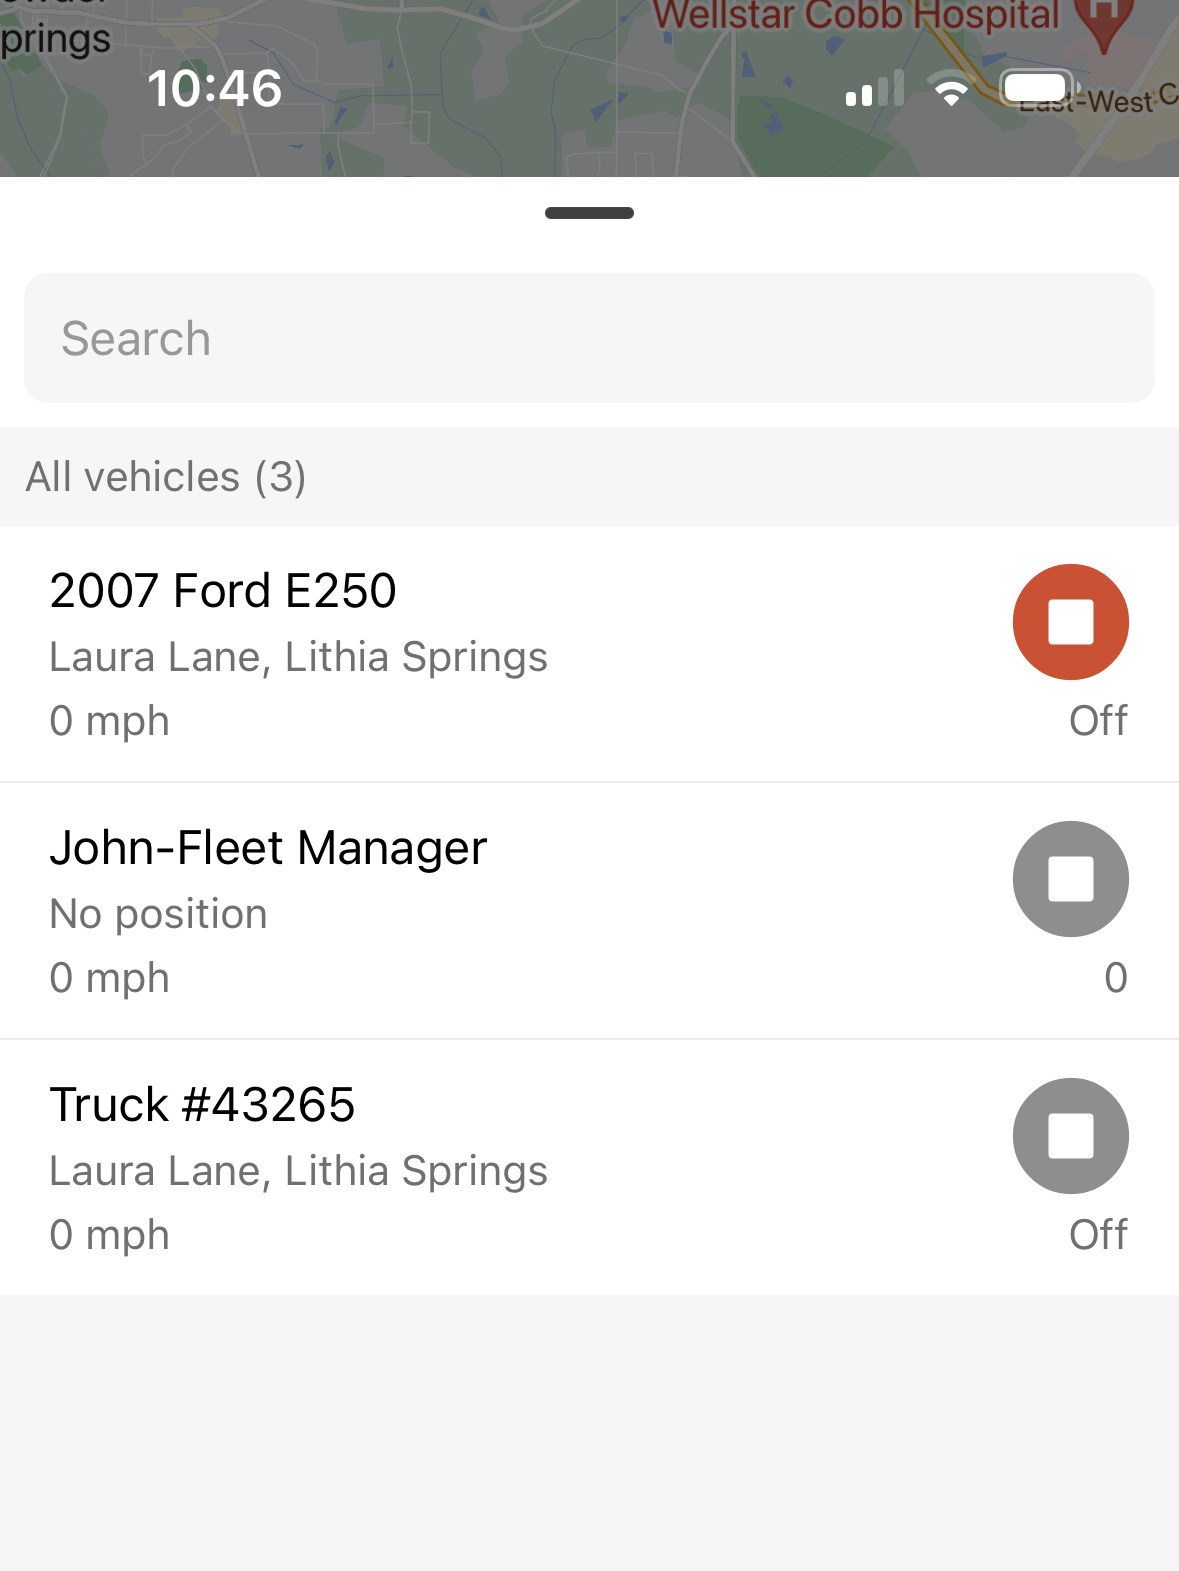
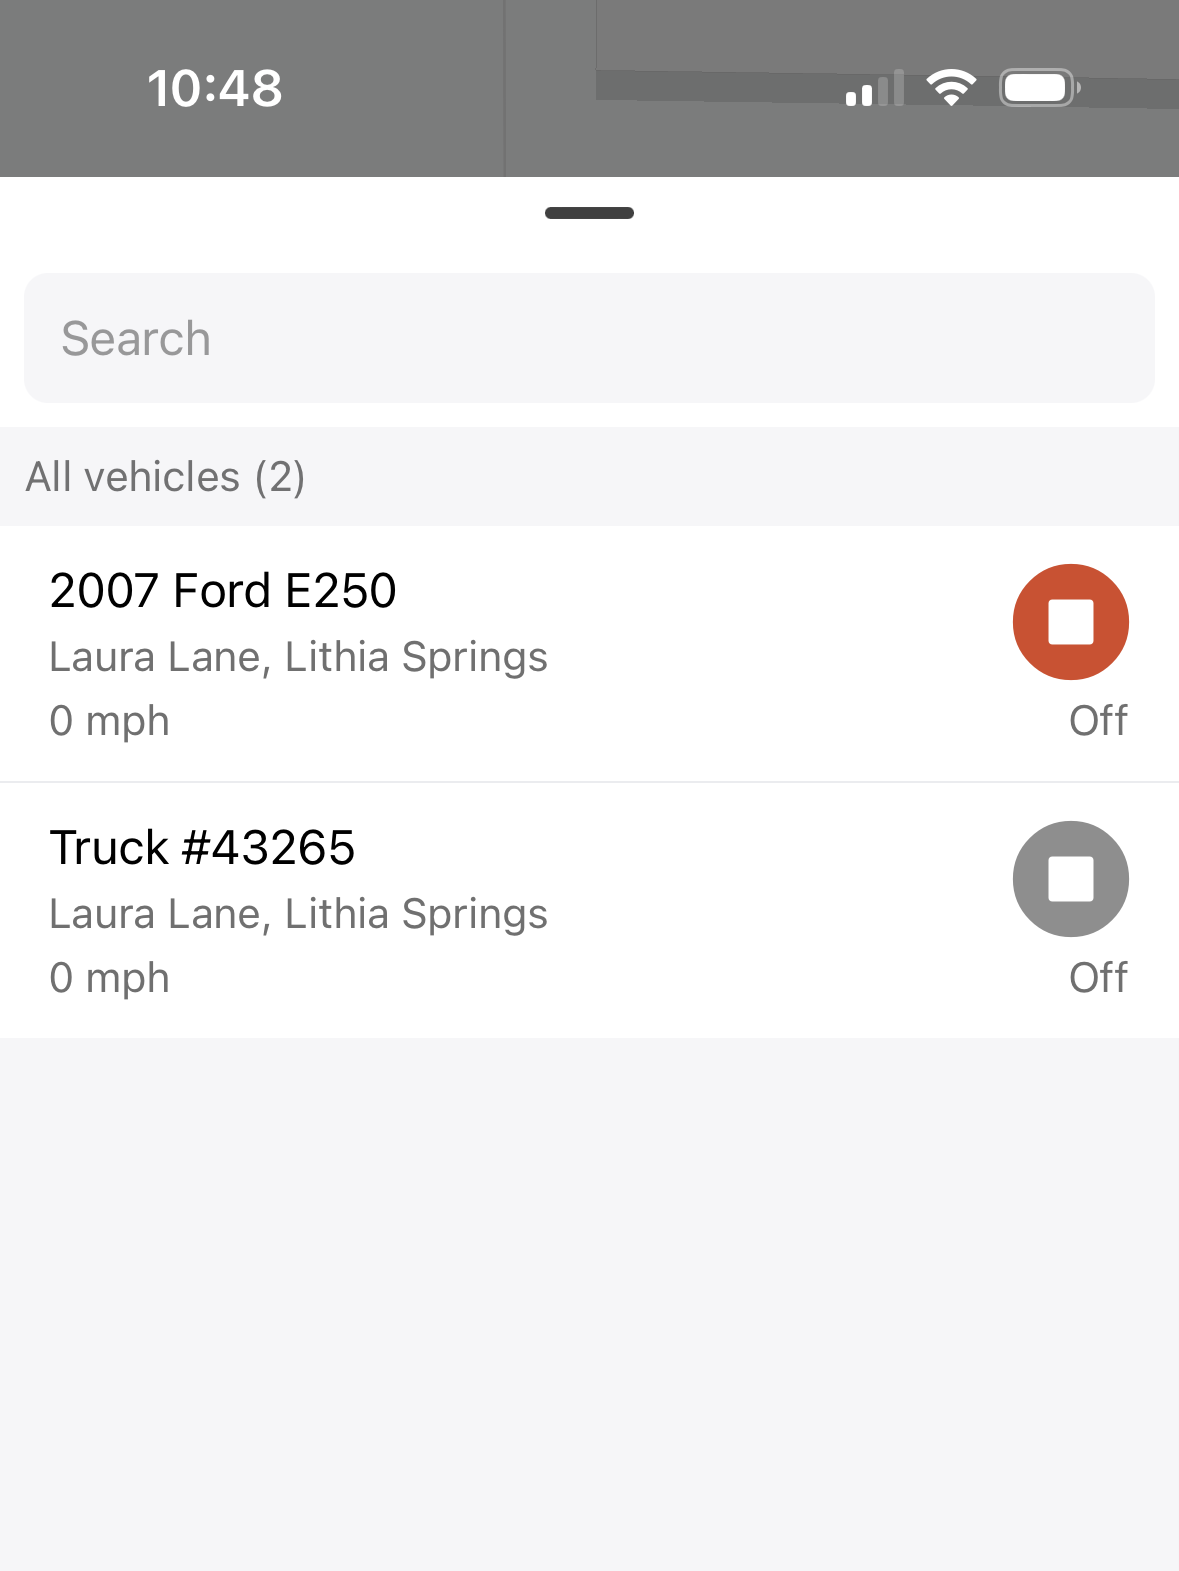
- Tap the car icon in the lower right to find a specific device under the Vehicles tab.
- You can search for the device’s name in search bar or tap the name of the desired device.
Changing the View:
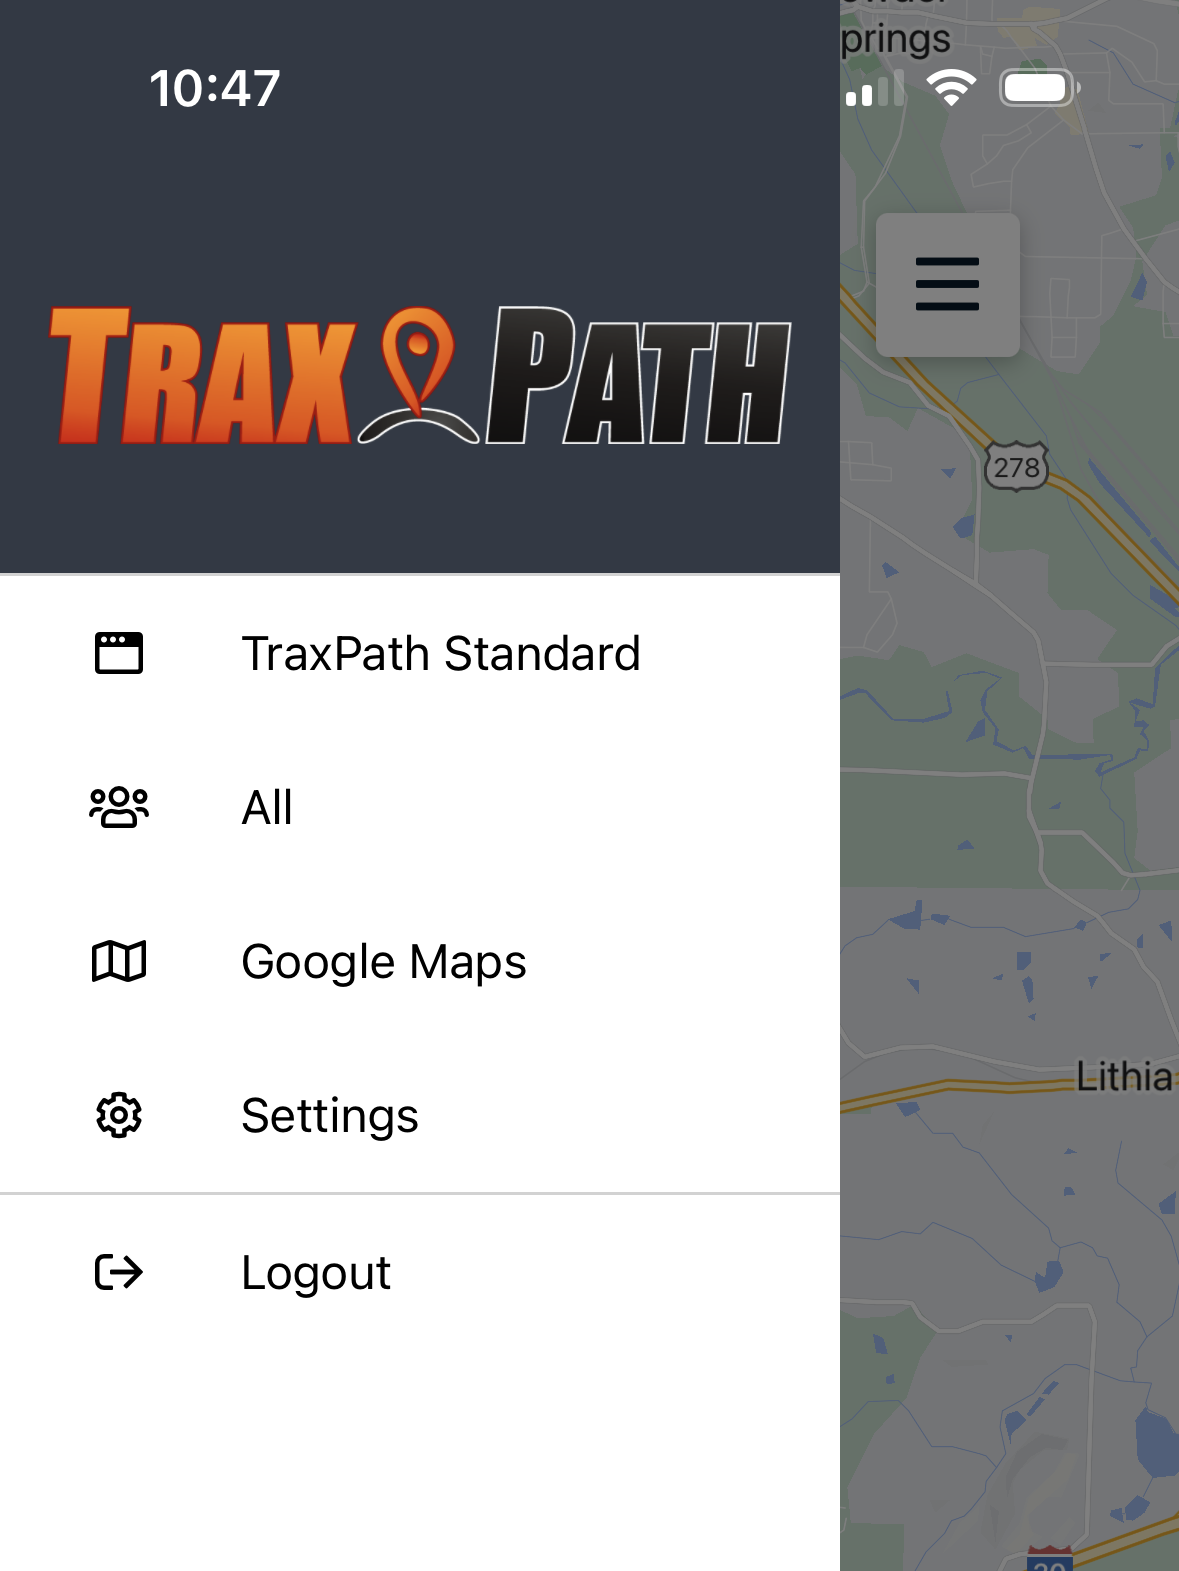
- Tap menu icon in the top left corner of the main screen.
- Tap the people icon (2nd in the list below your account name)
- Select the desired view.
- Devices: will only show your devices/vehicles
- All: will show all devices/users
- COMING IN 2024: Users can also have devices or can be tracked directly from our upcoming TRACKER app for smartphones.
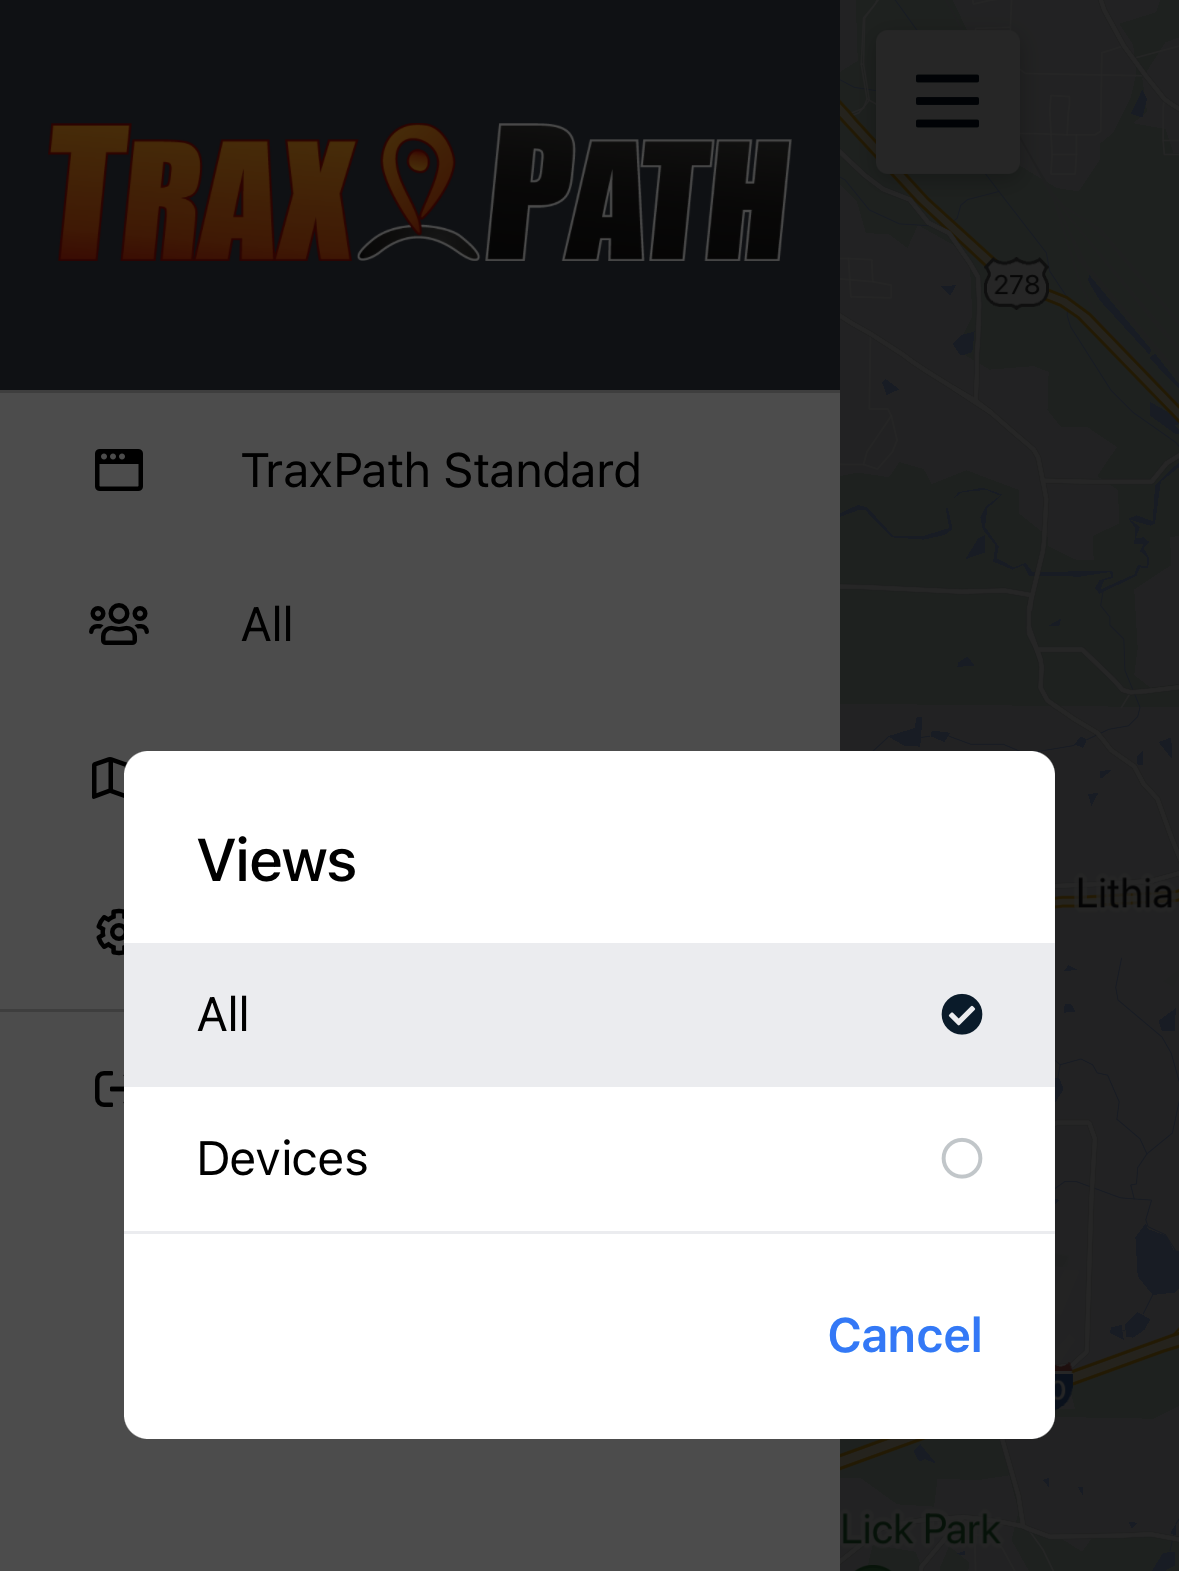
- By choosing Devices, the tab will display only the Vehicles from the Fleet.
Getting a vehicle’s info
1. Search for the vehicle name using any of the previous methods.
2. Touch the vehicle icon to retrieve more information about this unit.
(you will notice that the vehicle’s information panel will show up at the bottom)
- Swipe up to see more details about the device position and available data points.
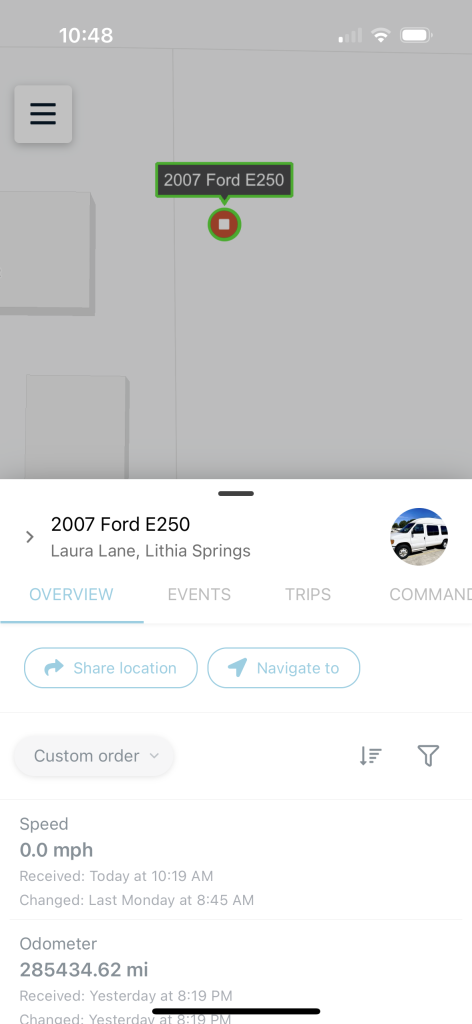
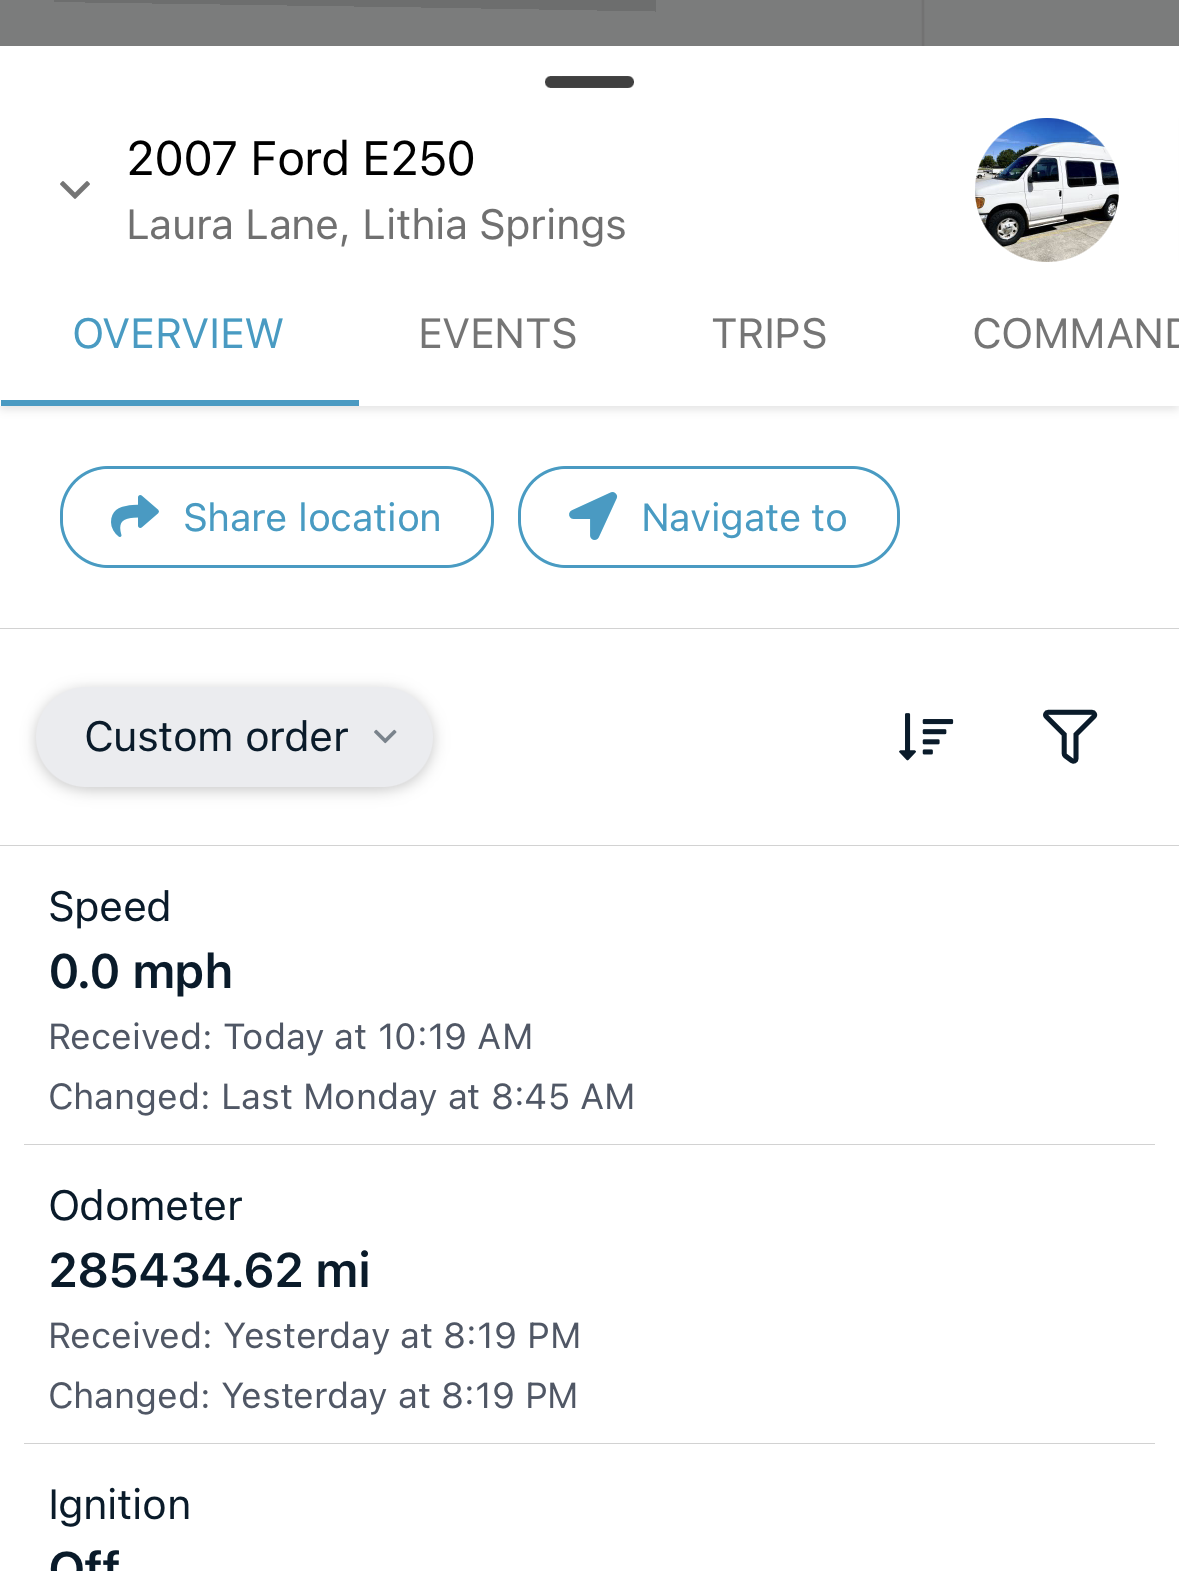
Vehicle Info Panel Overview
- Share location

This option enables live location sharing. You can share the generated link with any person of your choice.
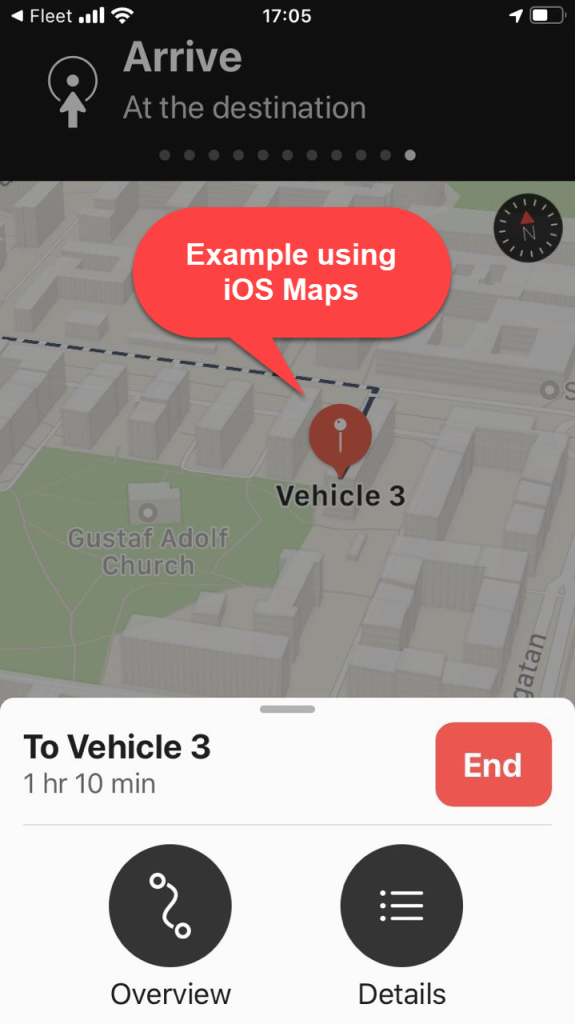
- Navigation

This option gives the possibility of navigating to the current vehicle’s position using your phone’s default navigation program (e.g. Maps on iOS or Google Maps on Android).
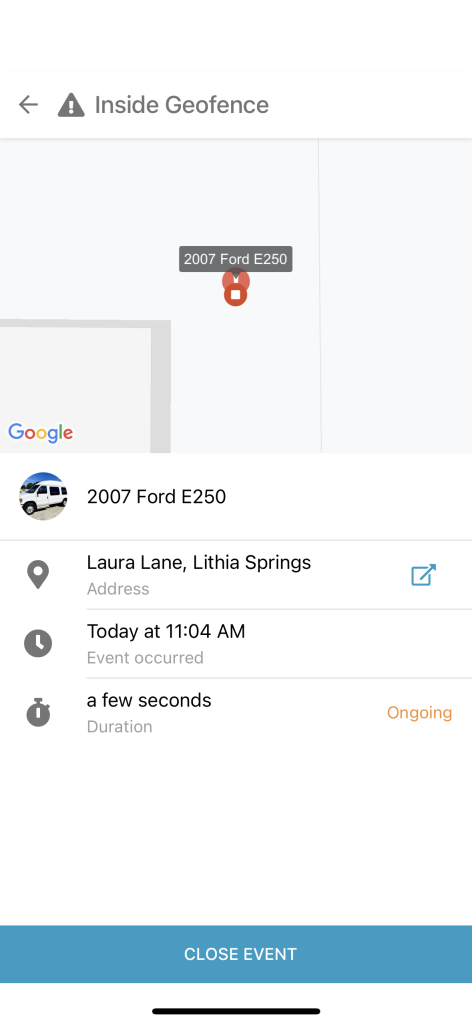
Events
- To see specific vehicle events only, tap on the vehicle’s Event tab.
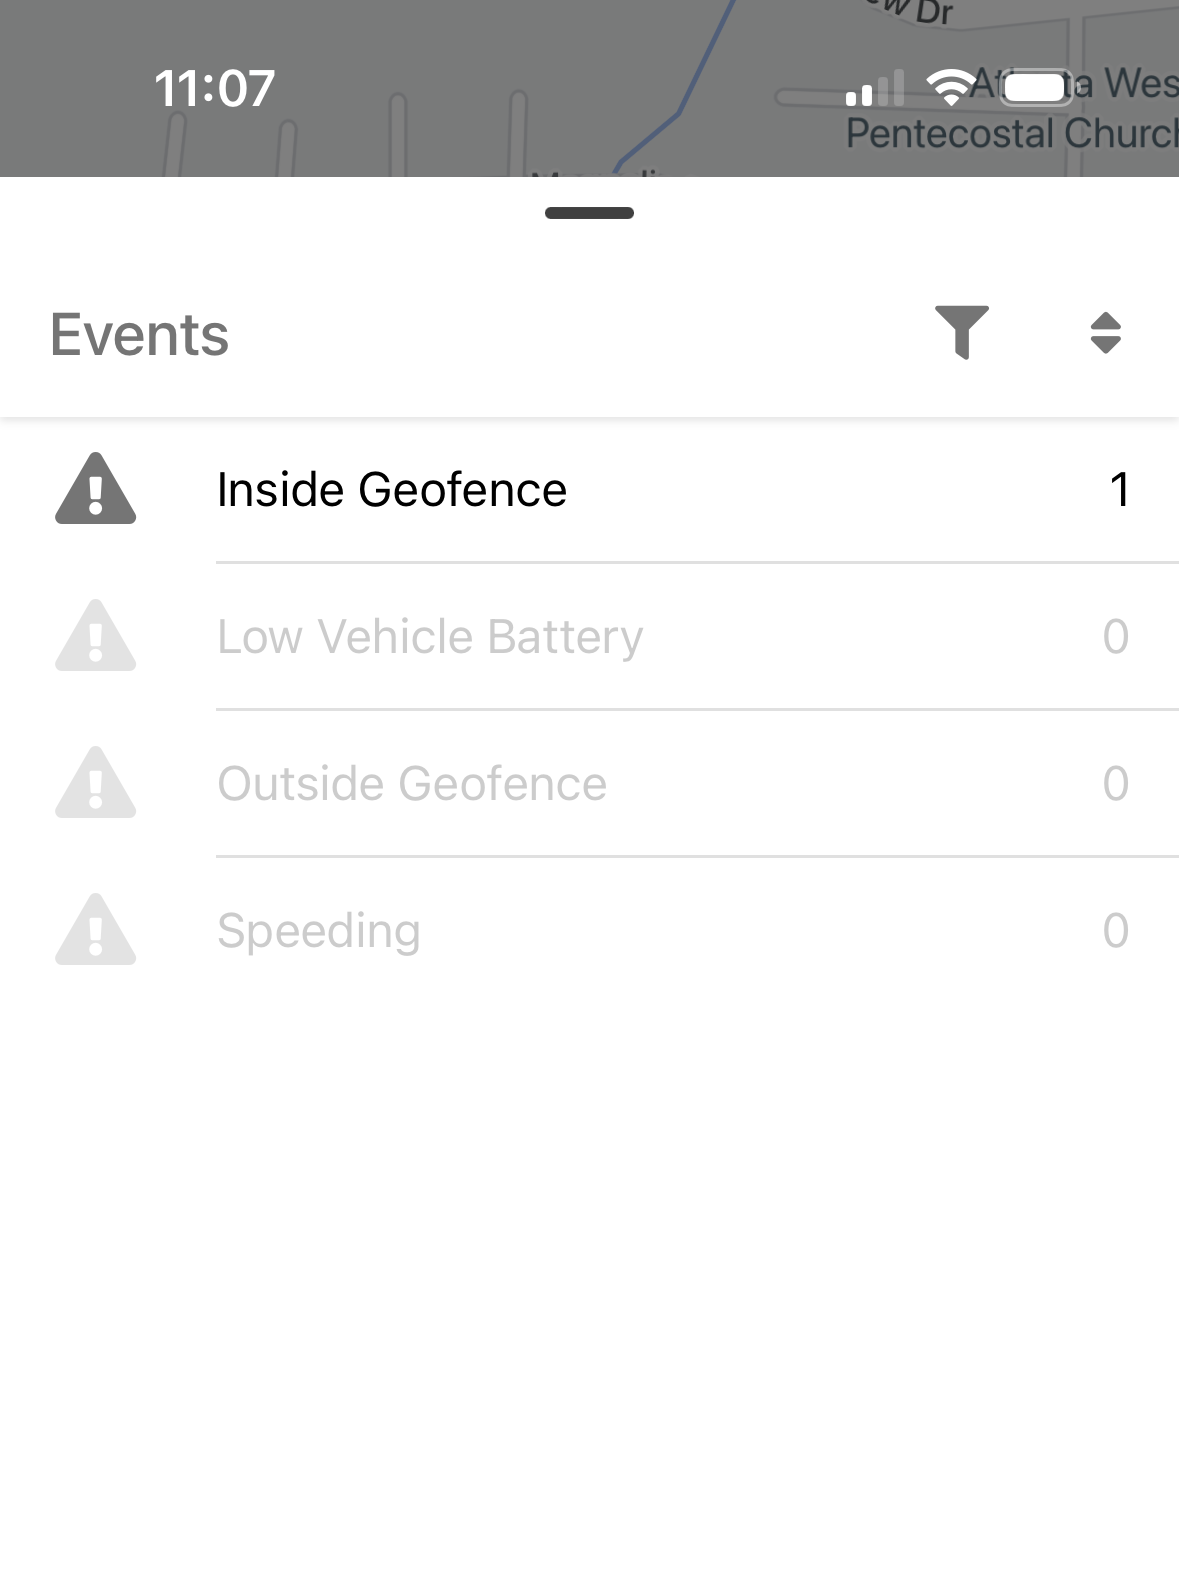
This selection will only show events opened for that particular unit.
- To see a count of all events instead, tap on the Events icon at the bottom-right of the screen.

- The events are grouped also by dates:
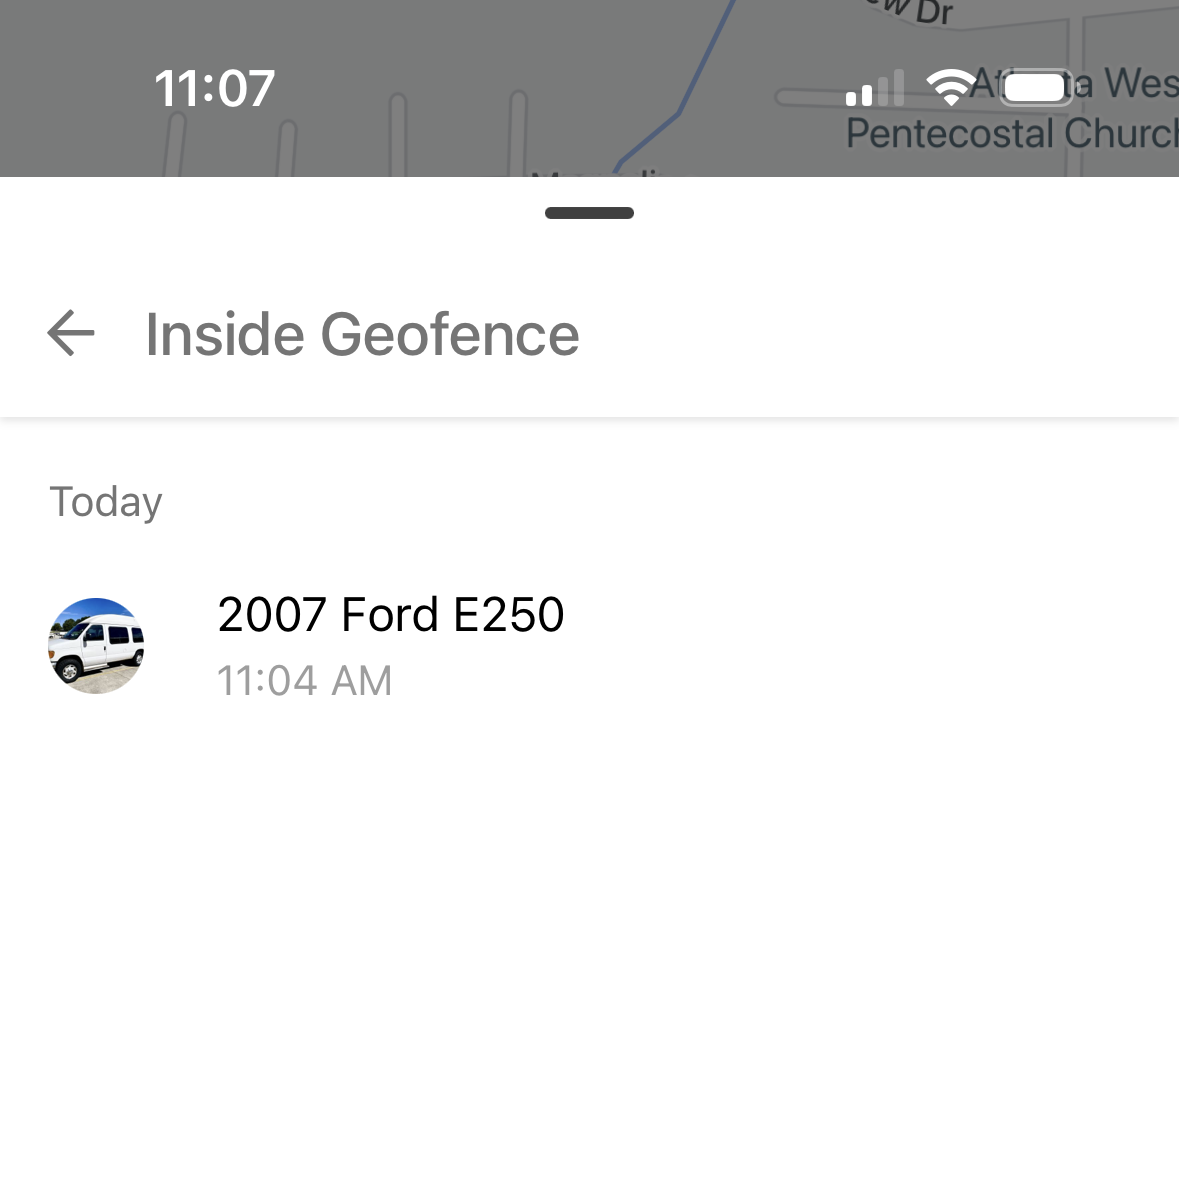
Note: greyed events are the ones already closed. Pending events are shown in bold.
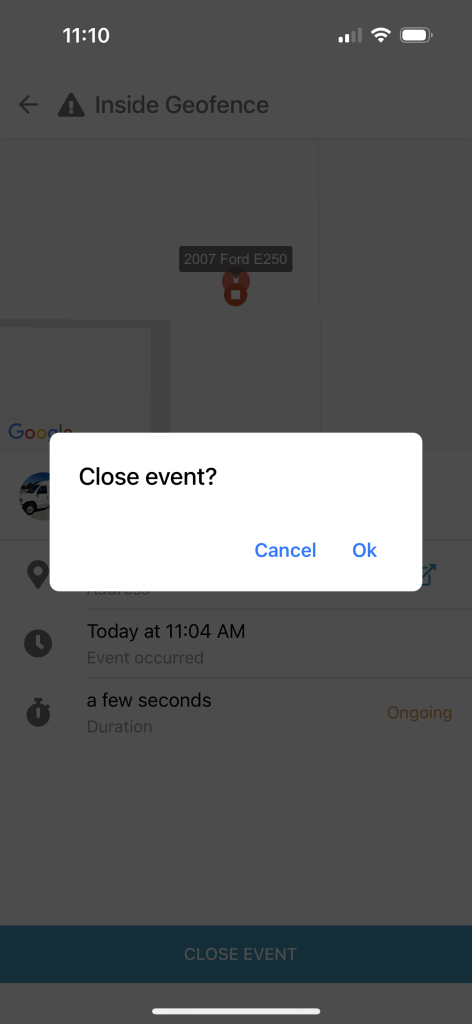
- Once inside that particular event, you can decide to close the event or add a comment. A comment will be registered on the server’s side for that particular event.
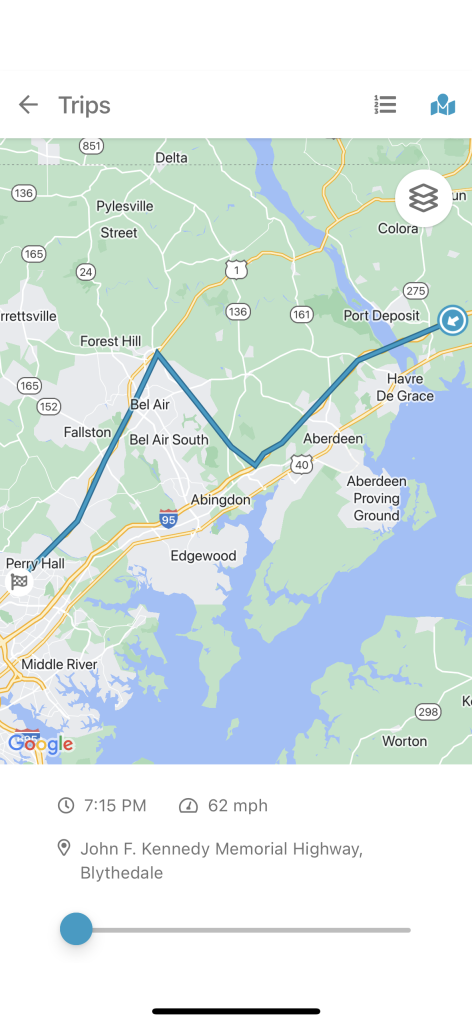
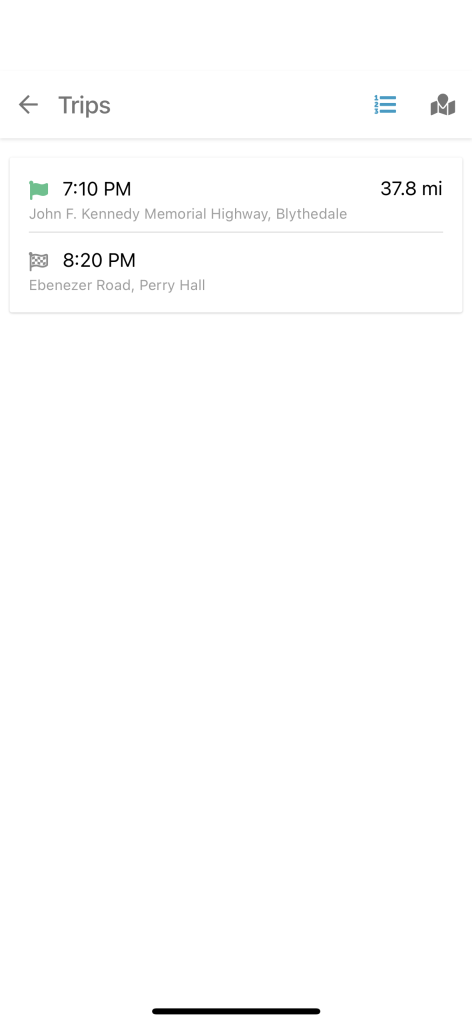
Trips
- To view your trips, search for your vehicle, and then tap on it.
- Swipe up from the vehicle properties at the bottom to see more details about this unit.
- Tap again on Draw all to view your trips on the map
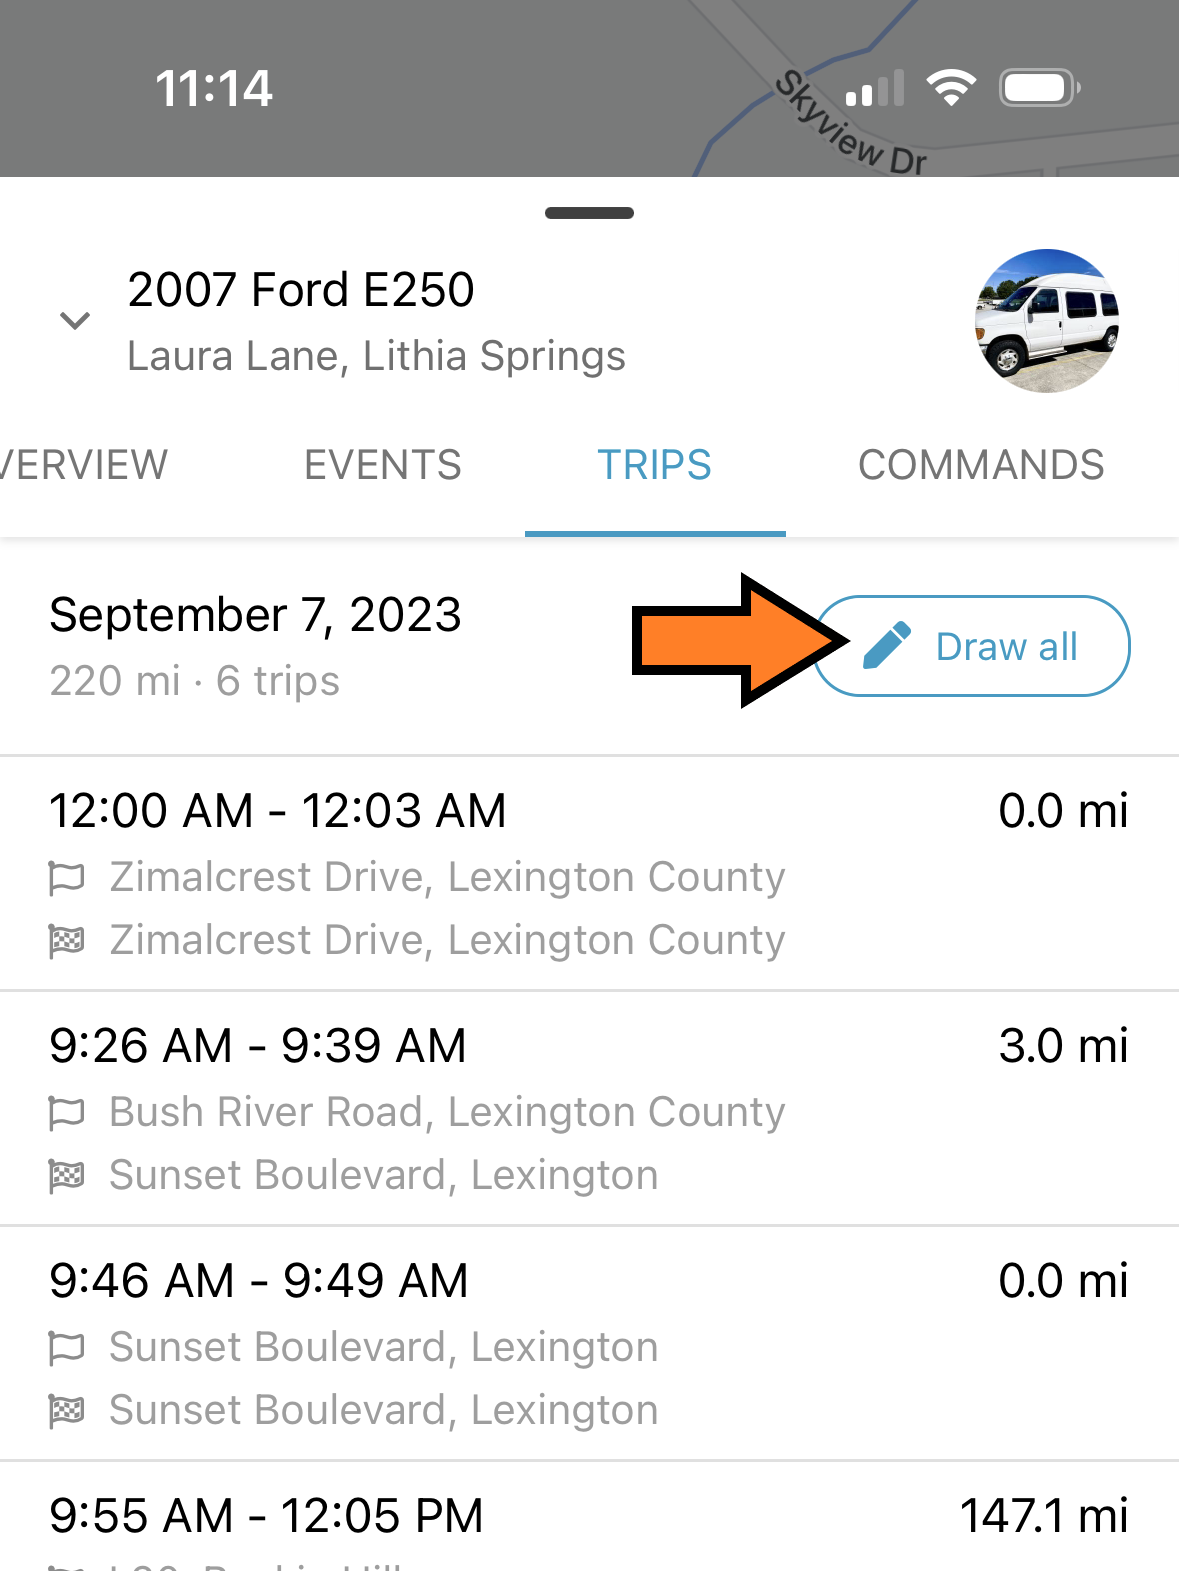
- Once the trip is drawn on the map, you can drag the control bar forward or backward to browse through the trip and get more information about a particular moment.
- List icon display the information of the trip from the start until the end.
Commands
COMING SOON: You can send commands to your devices directly from the app.
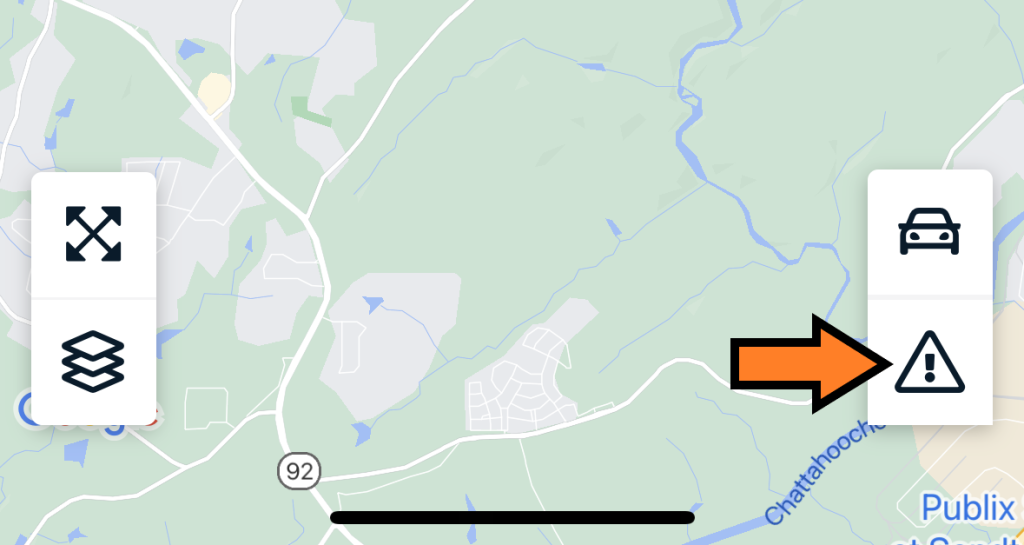
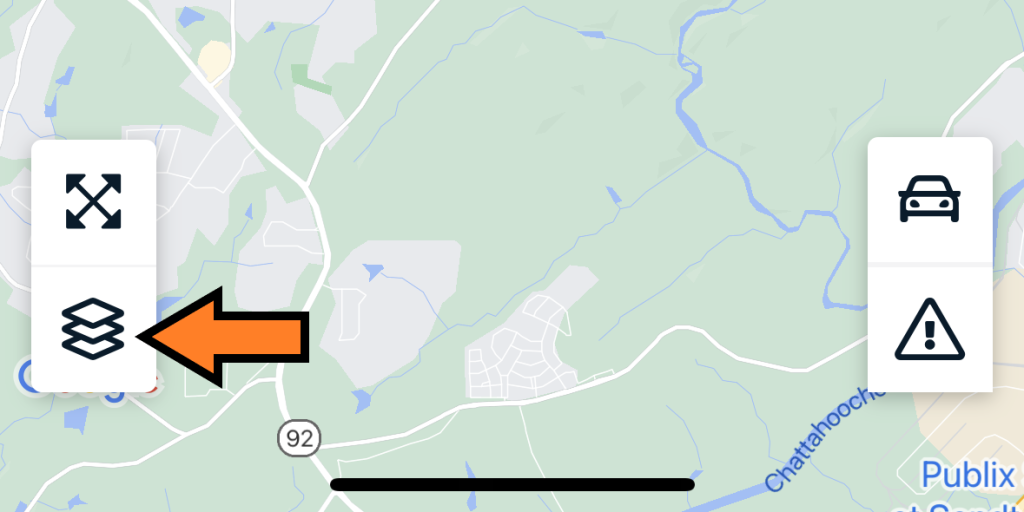
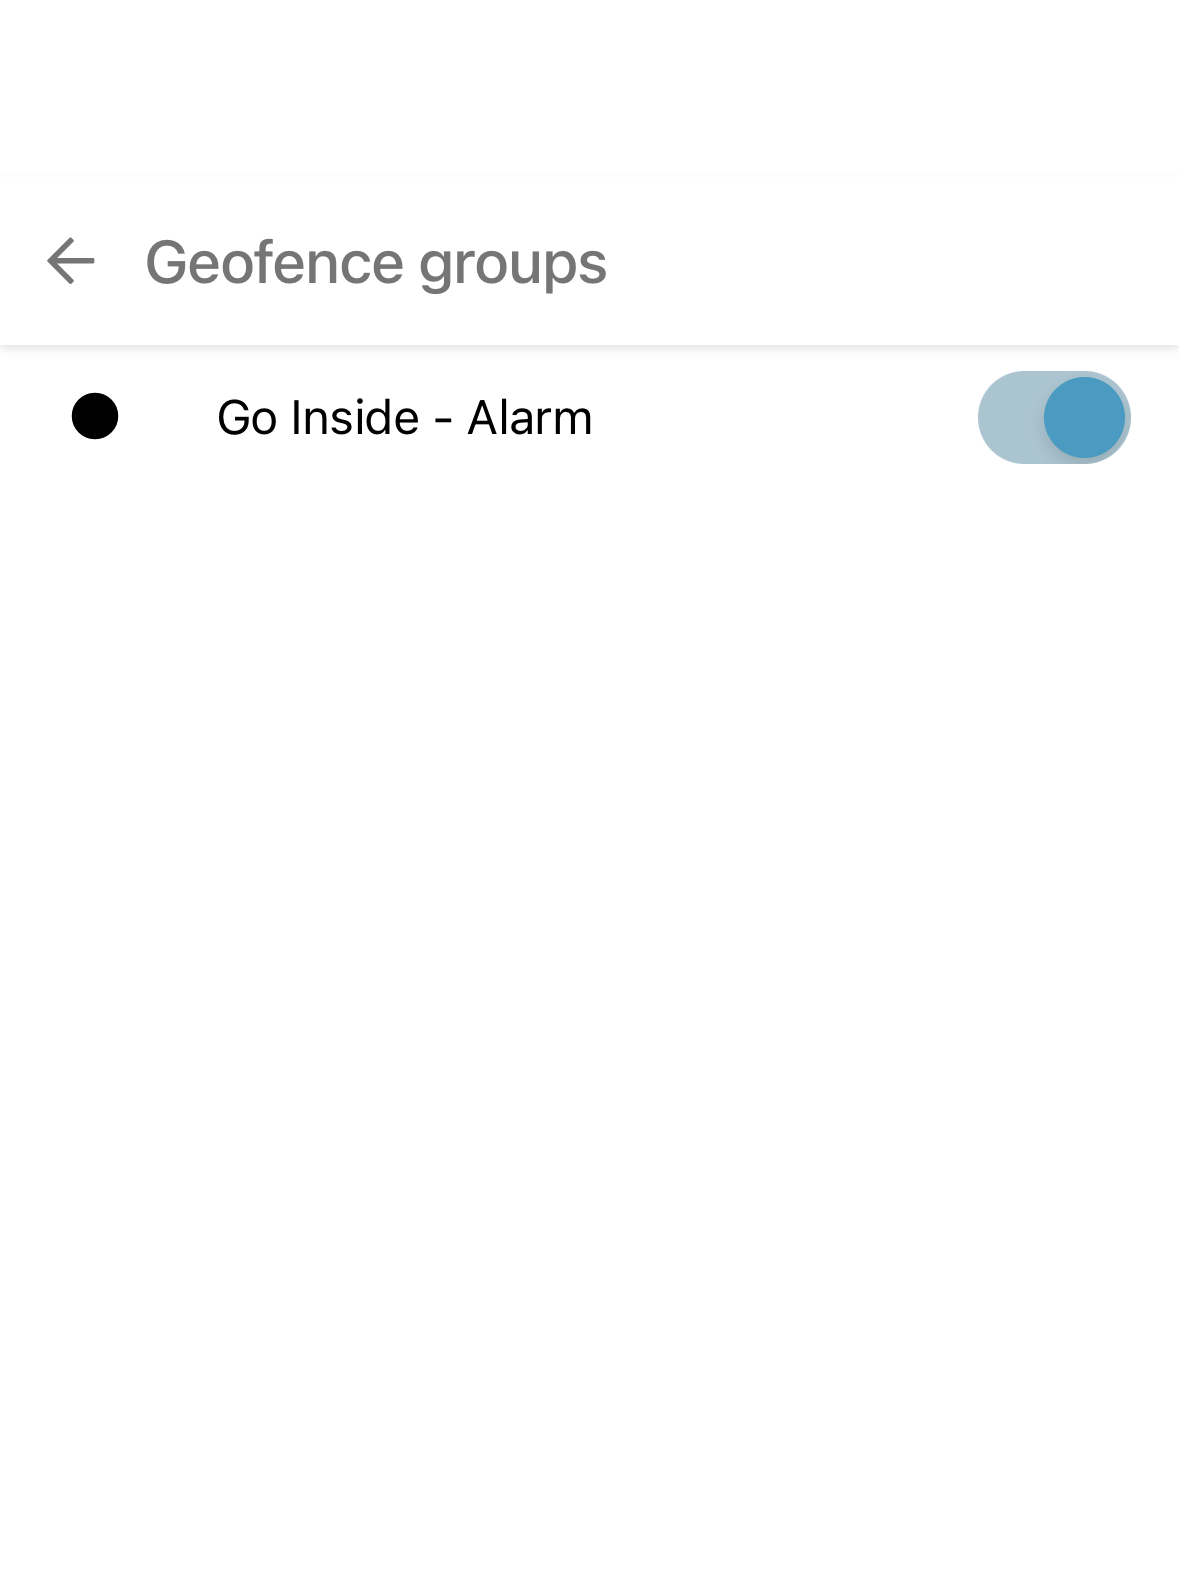
Geofences
Geofences can be displayed in the app as well.
1. Select the layers option on the right of the screen.
2. Activate Show geofences option.
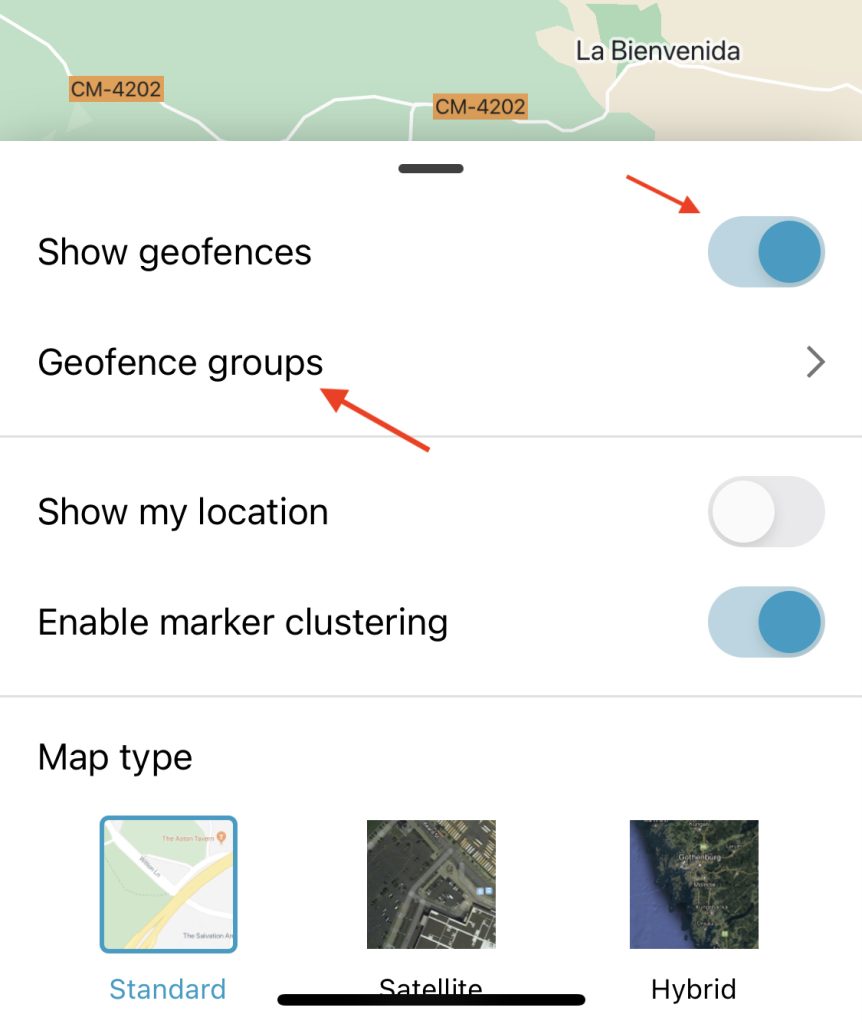
3. Select which geofence groups you want to display on the map.
Customizing Data Display
Select which data points you want to display for your vehicle(s).
1. Select the drop-down menu

2. Select Custom order
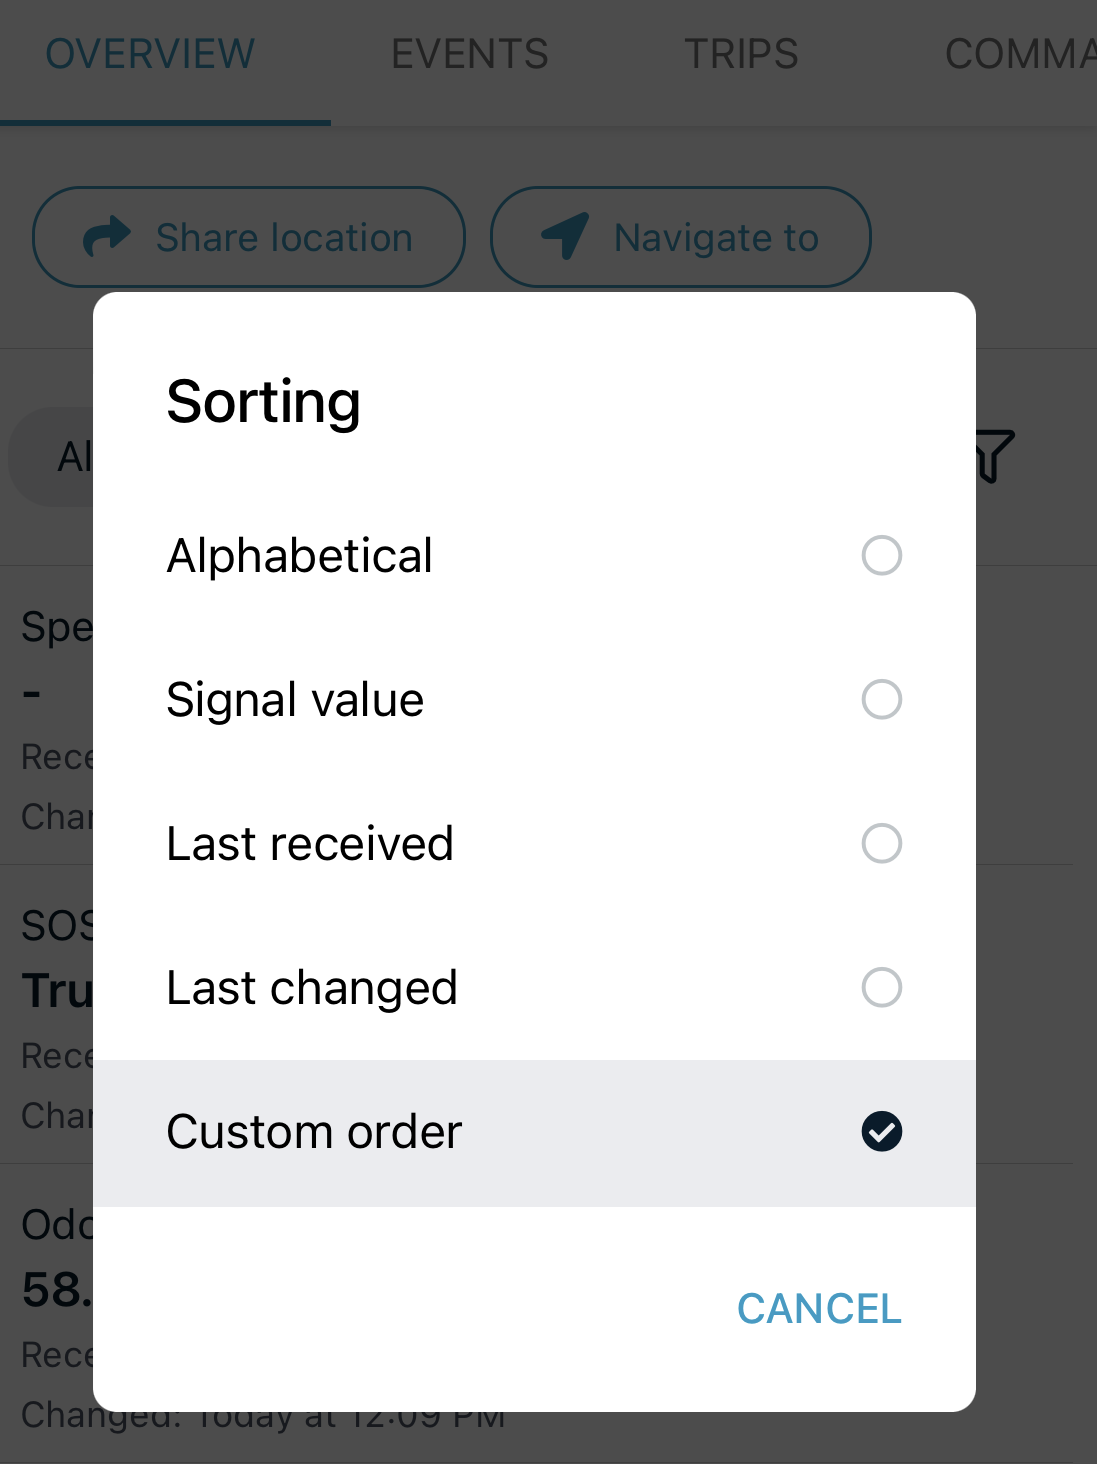
4. Go back to see the changes.